Self storage management is a big deal.
Along with a fat stack of daily tasks, there’s a lot of things that often require immediate attention. It takes effort and perspective to maintain productivity and forward momentum. Better efficiency takes the pressure off management. So how do we improve efficiency on specific tasks while holding a tight grip on overall operations?
The answer seems obvious - make a workflow that’s simple to work with and easy to stick with. In reality, implementing self storage software can be a bumpy ride.
In this “How-To” piece we’ll stick with the basics of task management, starting with labels.
Labels and Self Storage Management
Labels make you more organized. They’re a simple way of tagging data into tasks, priorities or groups. It’s no wonder that they’ve been used since the 17th century. Nowadays, they’re a vital component of every project management software. So how do we apply them to self storage management? Keep on reading, as adding labels to your facility management routine is actually a piece of cake.
Download the ultimate Self Storage e-book
Everything you need to know about setting up your self-storage facility.
1. Assign Labels to Key Data or Tasks You Need To Keep Track Of
Look at labels as types (or attributes) that you assign to groups. Groups are key data you always want to keep an eye on. Groups can be daily tasks, items, units, tenants, etc.
Creating Labels
To create and edit labels, click on your username and go to the “Labels” tab under “Main Settings”. Simply click on the plus (+) icon to add a new label. Enter the title and color then click “Create”.
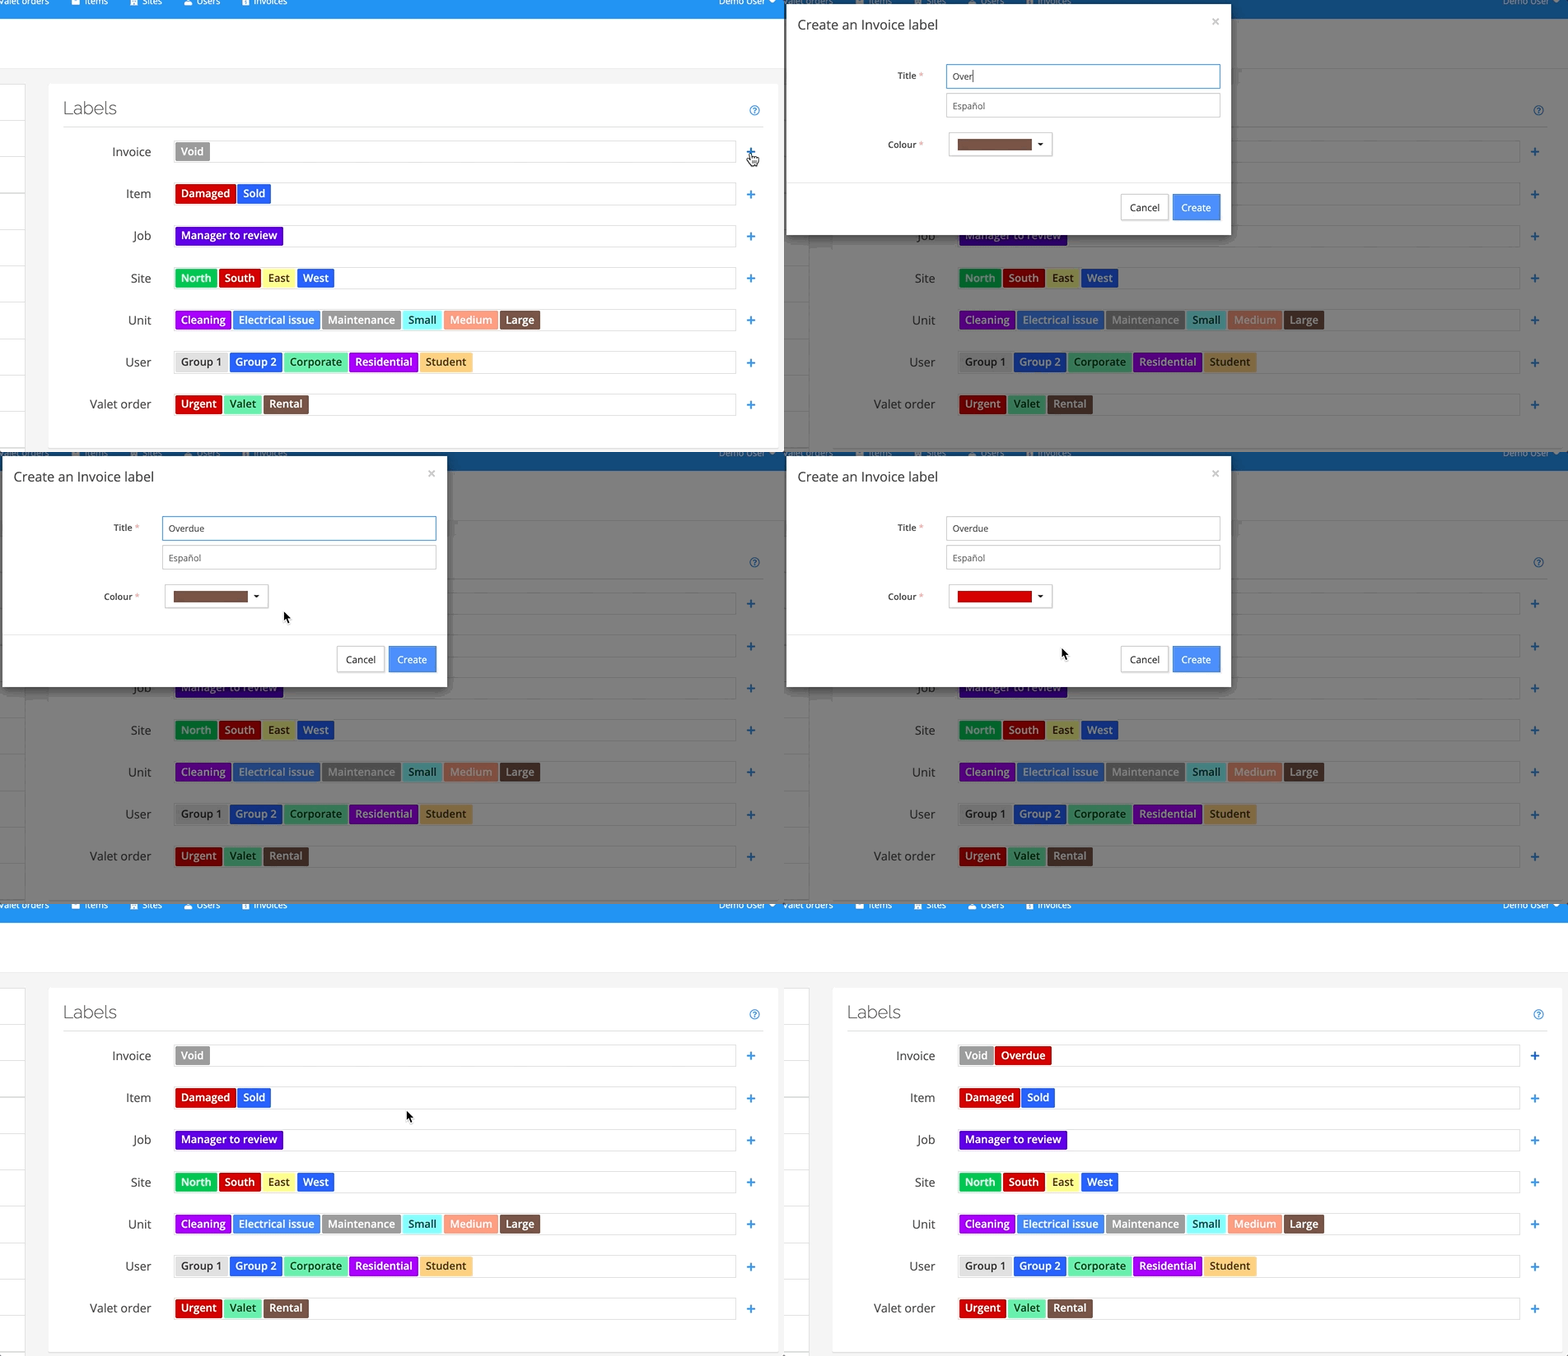
2. Group Tasks in a Workflow That’s Working Out for You and Your Team
Make a daily schedule based on a prioritized task list. Group tasks that need to be done and assign them to your team members.
Assigning Labels
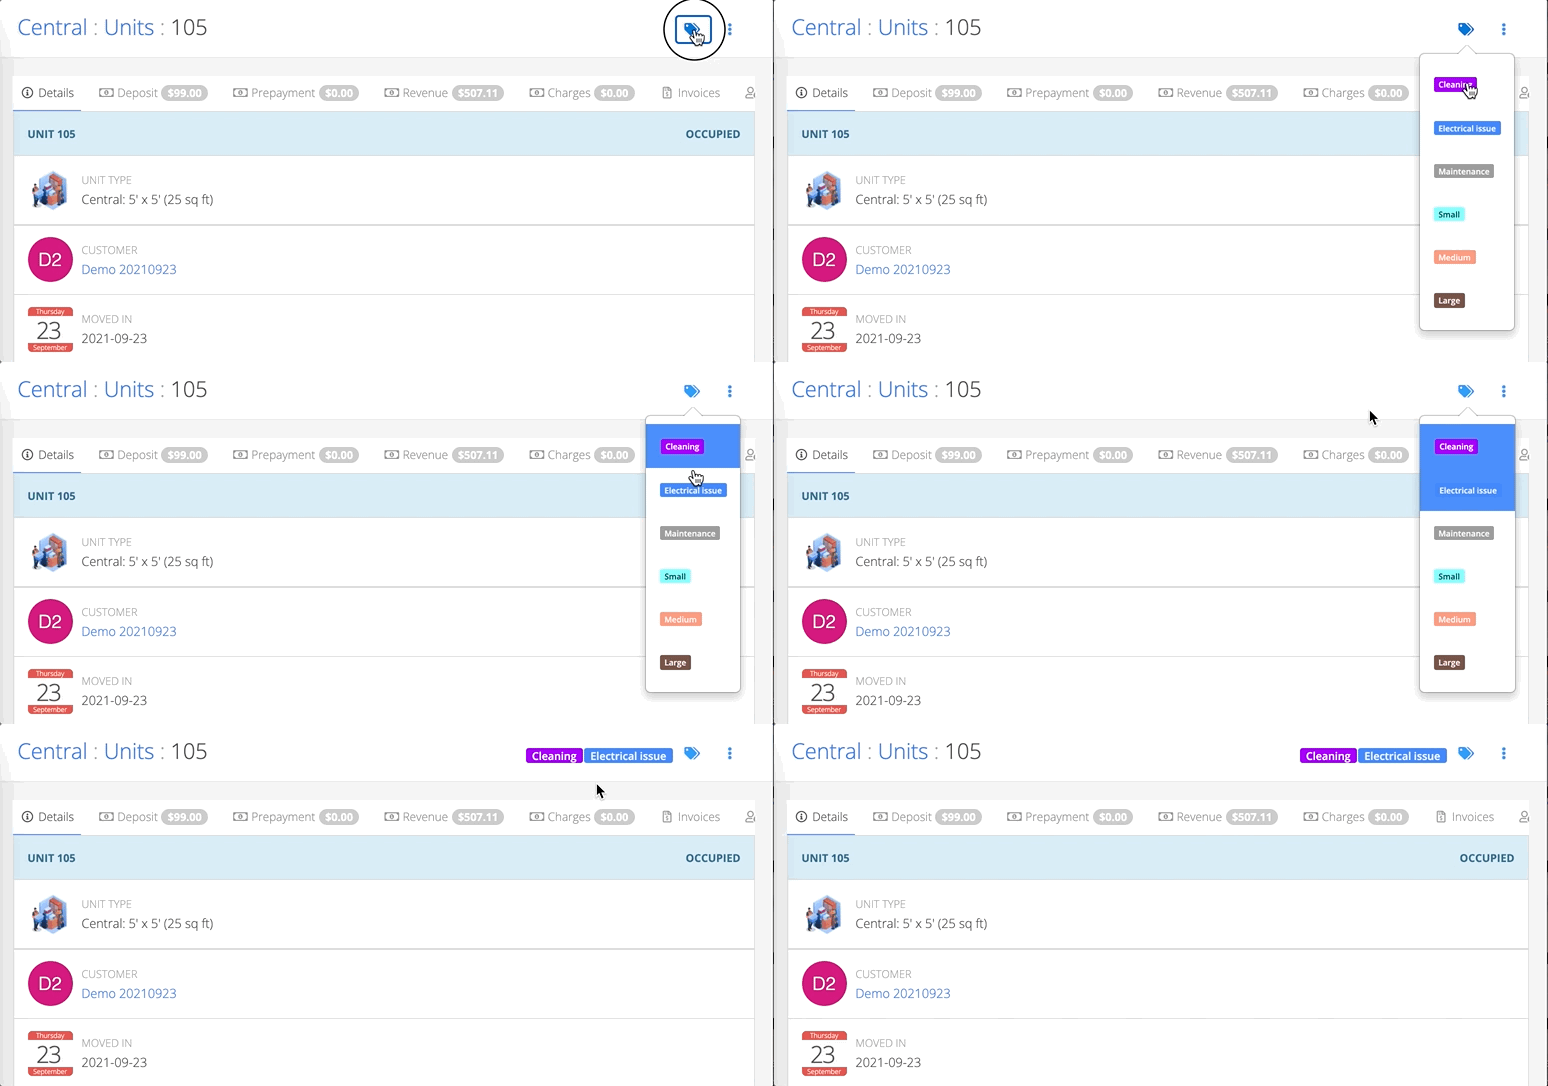
Pick something you’d like to assign a label to (eg. user, unit, item, etc.), then click on the label icon in the top right corner and just pick a label.
3. Mix Them With Filters To Get a Birds-Eye View of Every Aspect of Your Self Storage Service
Use filters to clear up things and give you a view of just the data you want to see. You can do this in just a few clicks.
Applying Filters to Labels
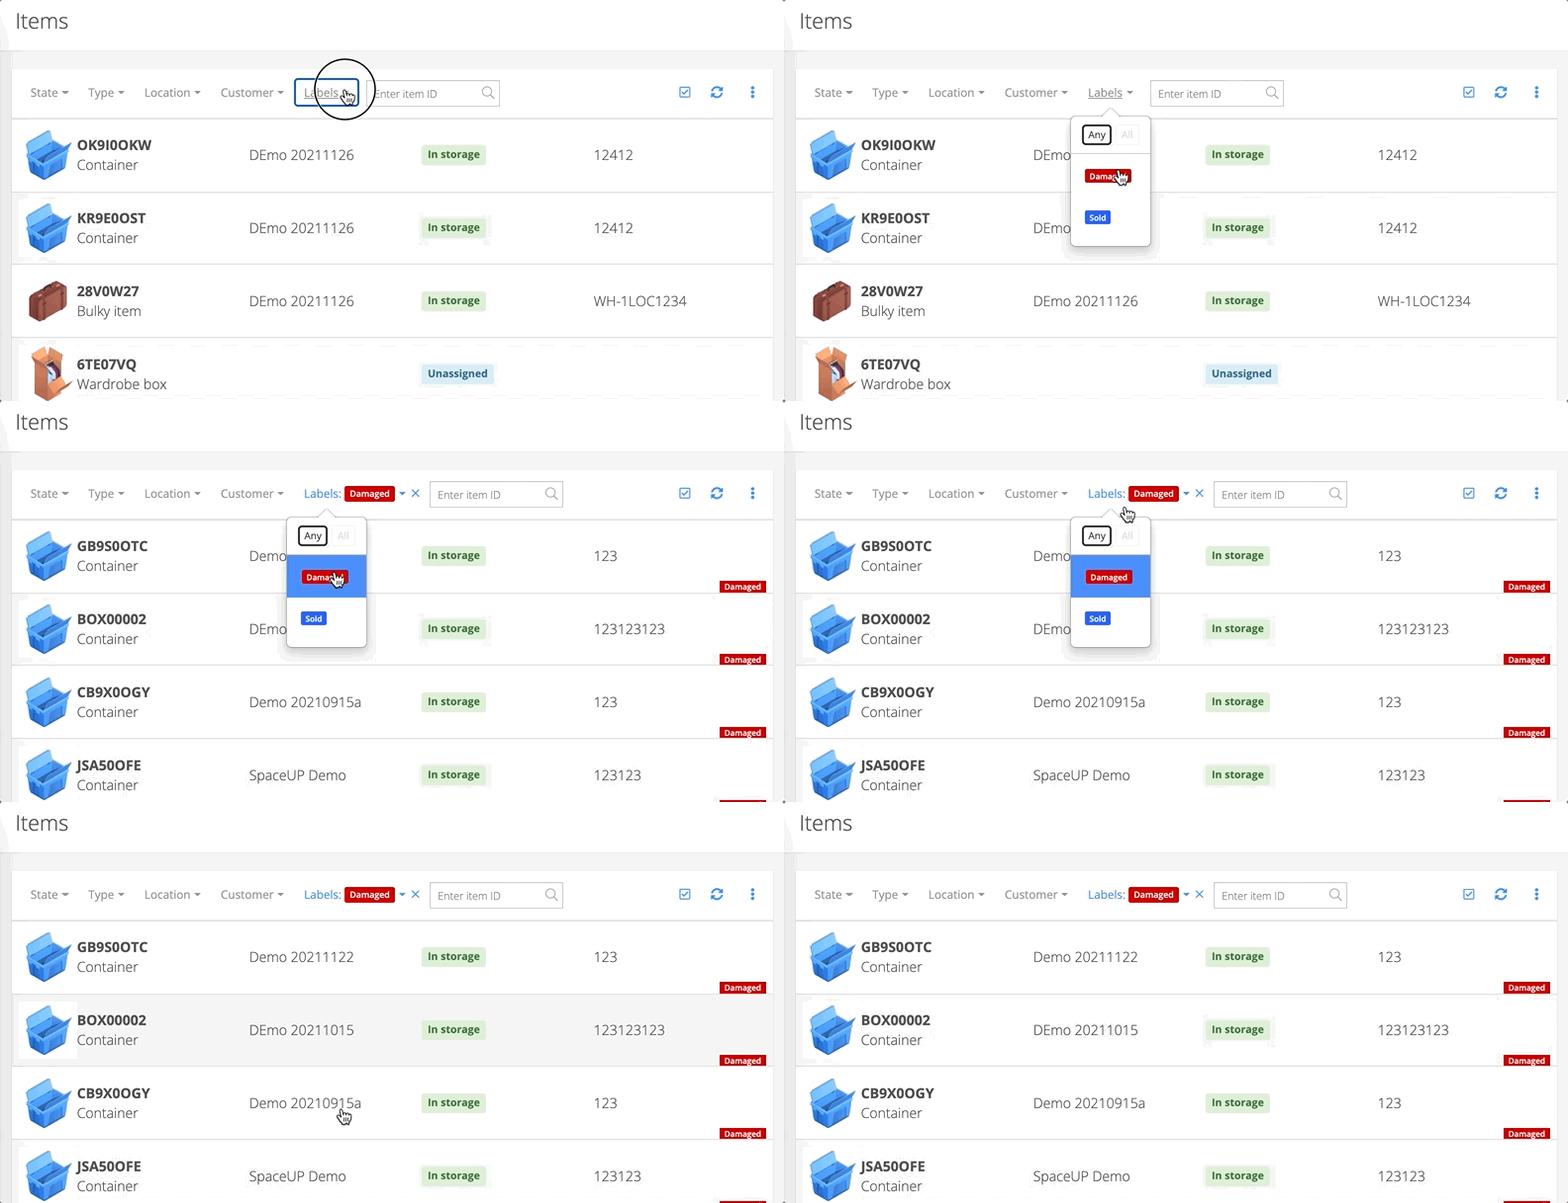
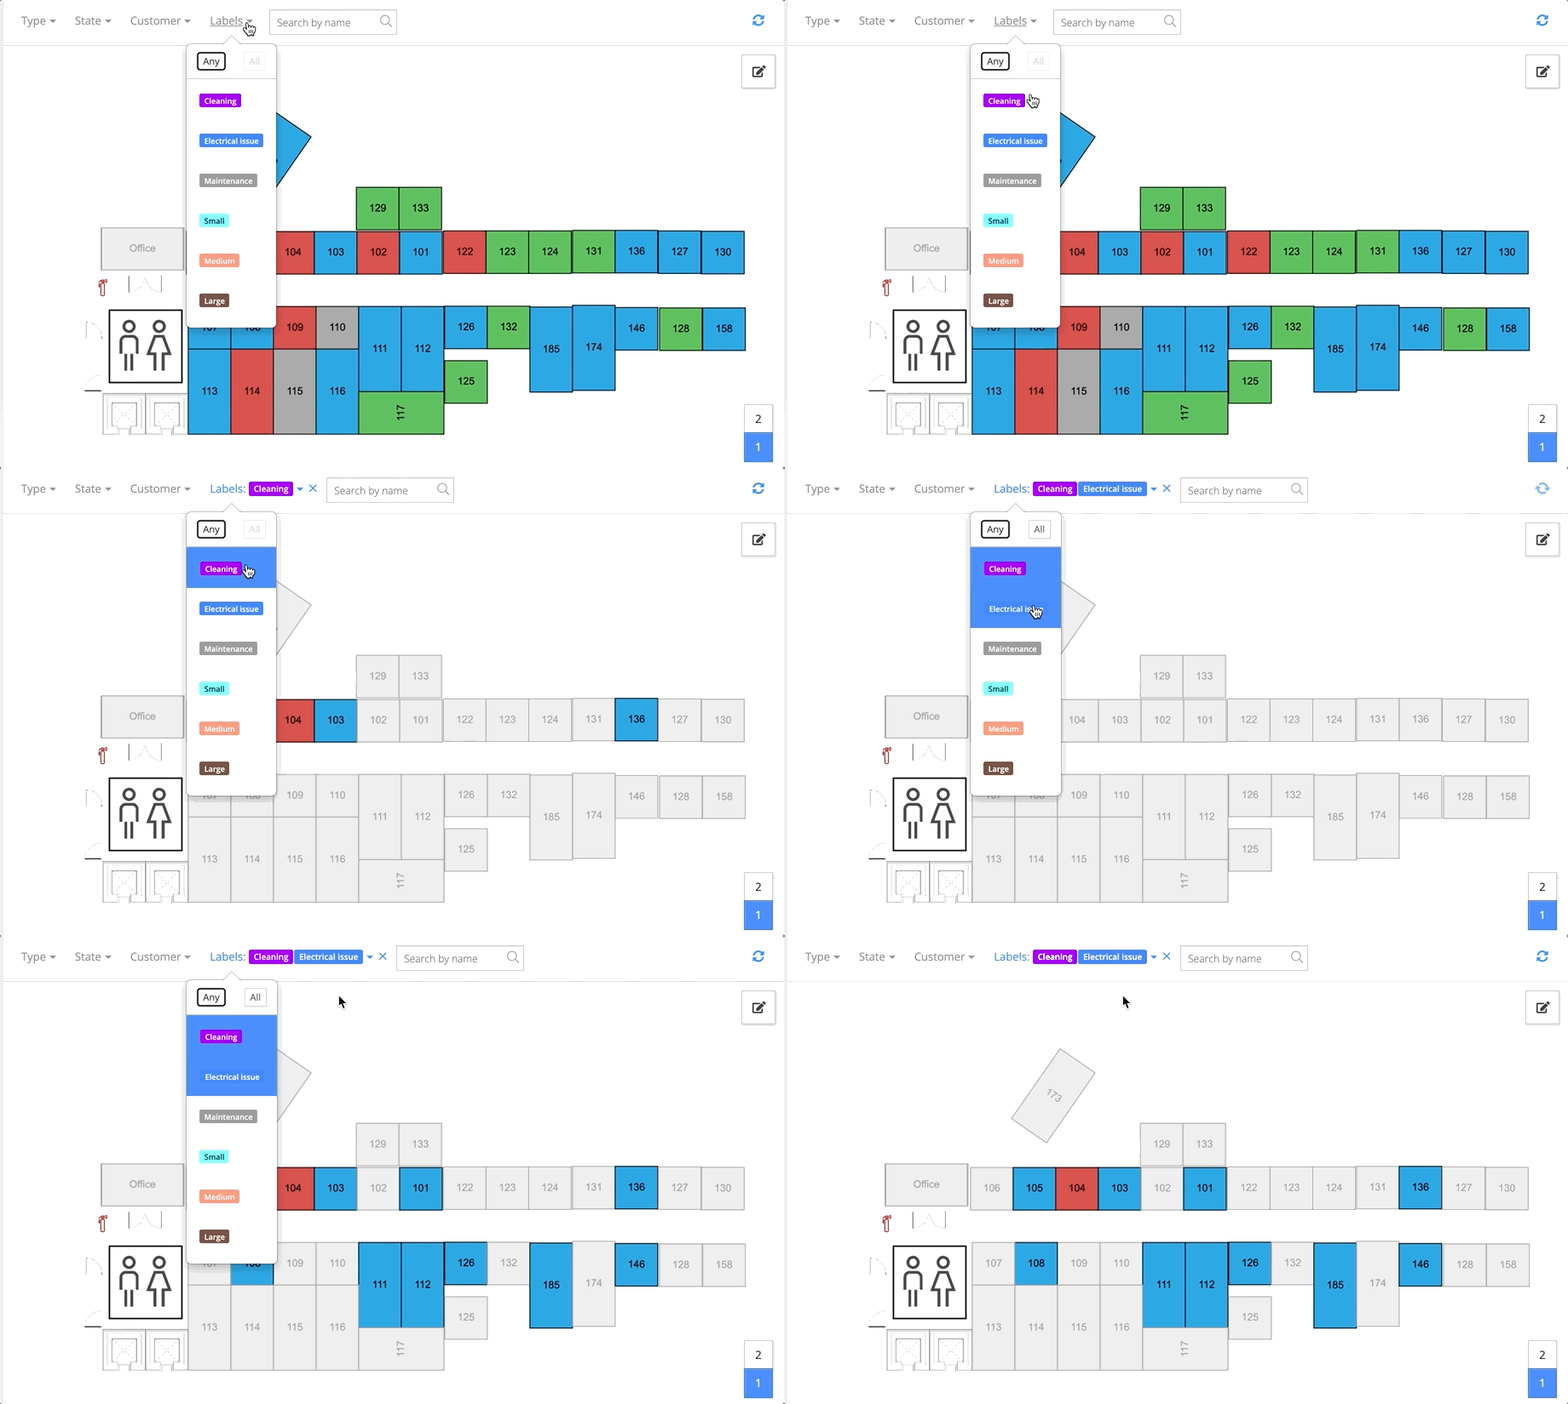
Click on Labels. When a label sheet appears click on the “Labels” button on top of the table, then pick out all the labels you’d like to filter out.
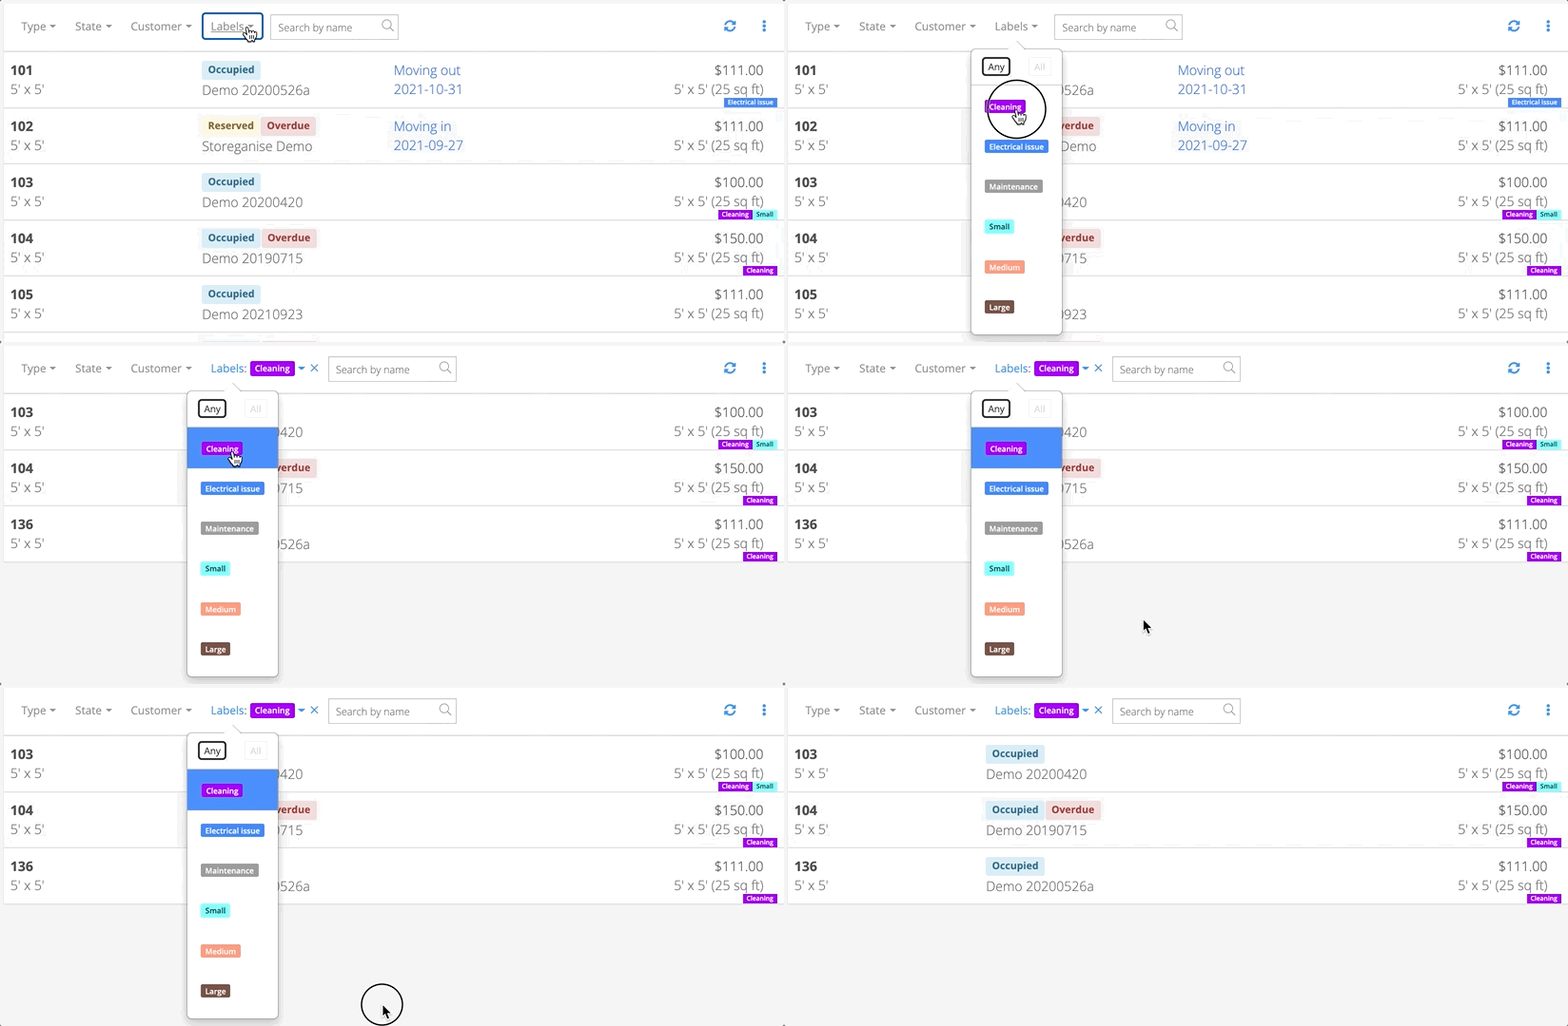
Filter your units based on custom unit labels (e.g. electrical issue), or filter items based on labels such as ‘damaged’ and ‘sold’. You get the idea.
4. Do Your Thing
Every individual has a routine that best fits their needs, so we’re gonna leave this one to you. Pick a workflow that you and your staff are comfortable with, to keep everything tidy and organized. As you can see little hacks can make a big difference. Applying the labels and grouping them is really easy. They’re a huge time saver for both managers and staff alike. Our clients love to use them.
Bonus: Self-Storage Sitemap
If you’re more of a visual type, with Storeganise you can easily generate a sitemap or your facility with units that have labels attached to them.
Labels and Self Storage Software
In one of our previous blog posts on choosing the right self storage management software, we discussed the most important self storage software features. Even though labels weren’t mentioned they’re one of those subtle, but important organization features.
Other than labels, Storeganise is packed with a bunch of key software features for smooth self storage management, marketing and automation.
If you’d like to give labels a try, feel free to request a free account or a personalised demo walkthrough.
